Who doesn’t love vintage furniture? It’s packed with charm and built to last. And the best part is that revamping these pre-loved pieces is often much easier (not to mention cheaper) than you think!
So if you love the shape of that chair you inherited from Nanna (but aren’t a fan of the upholstery) don’t give up yet. Lisa Wilkin from Lisa Wilkin Interiors reveals the latest tips and tricks for giving those old treasures a glow up!
Buy pieces you can restore
When buying pre-loved furniture, look for good, solid pieces that you will have forever. Solid wood items are sturdier than veneer piece and will wear better in the long run. Check any doors to make sure they swing well and line up with the frame. If the item has drawers, ensure they open smoothly. You should also check to see if there is any water damage and if the backing panel is in good condition.
Know your materials
Touching the furniture and feeling the grain will let you know what kind of material you are working with, including whether it’s timber or veneer. If a piece isn’t made of solid wood, you can still paint it, but you will need to use a specially designed primer first. This will ensures the paint has something to ‘bond’ with when it is being applied. Any paint that doesn’t adhere to the furniture will chip and scuff quickly.

Touching the furniture and feeling the grain will let you know what kind of material you are working with.
(Image: Getty)Get creative
The beauty of DIY flipping is that you can fix up furniture from any style or era! If you can’t find a certain style, you can create one to replicate the look that you are after with some nifty little tricks or colour choices. Inspiration can also be found on helpful platforms such as Pinterest or Instagram.
Pick up a paint brush
The great thing about home decor restoration is that anything can be painted, as long as there is no visible water damage. Use suppliers like Jolie Paint, which has a soft, subtle finish.
Another trick is to use leftover house paint or pick up sample pots for small pieces. If you’re painting a bigger piece, a house paint from Bunnings followed by a clear varnish over the top can be used. A one litre can will cover a bedside and a dresser, so you can make it affordable.
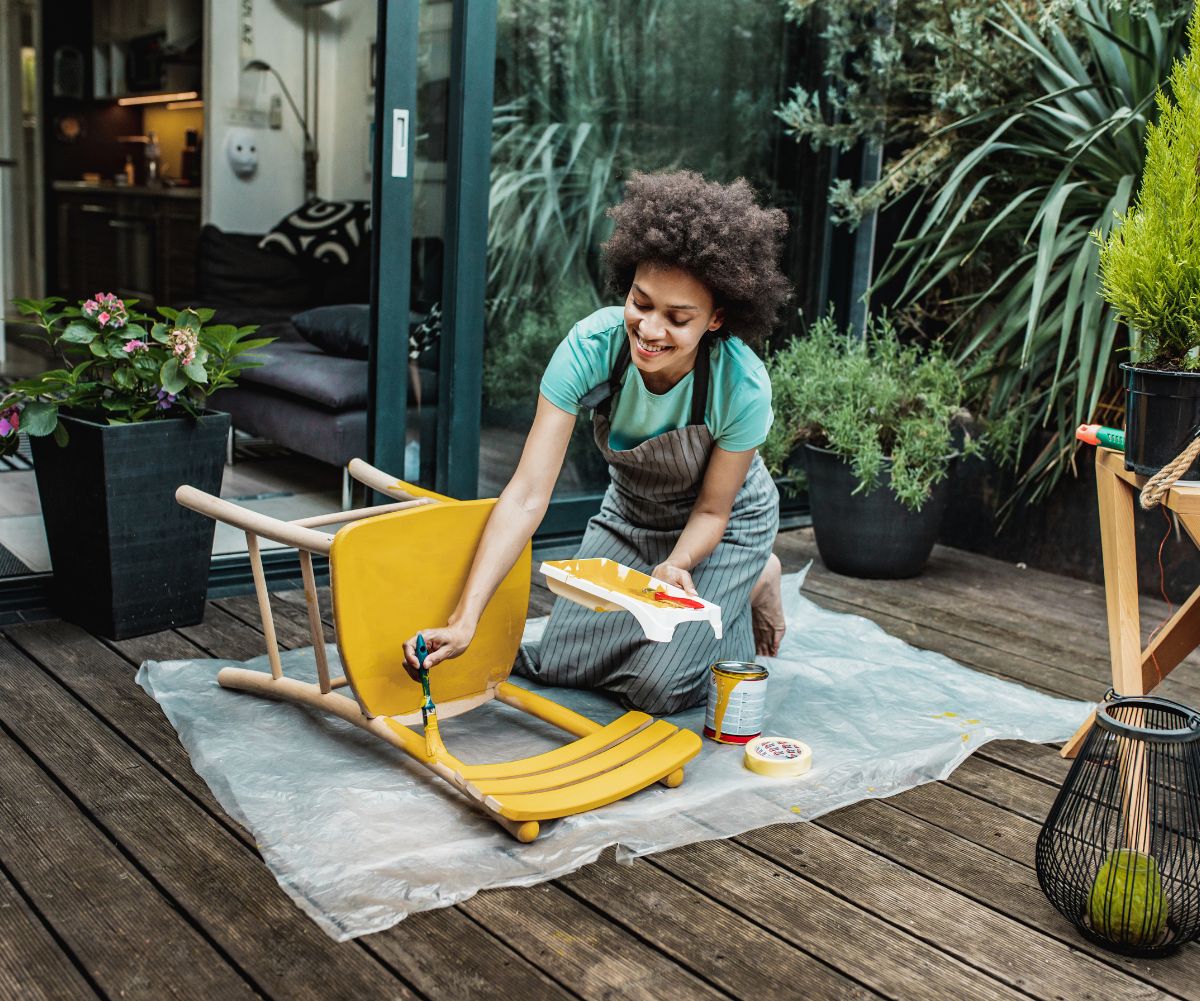
Pick up a paint brush!
(Image: Getty)Step-by-step guide
While painting new furniture is one thing, old pieces may need to be stripped to remove any varnish or grime before you restore them. The key is to pick something that has very little damage. Here’s how to refurbish a pre-loved piece of timber furniture!
First, clean the piece with warm water and sugar soap. Avoid using excess water to prevent damage. Then wipe it over with some warm water to remove any soap residue.
Then, scuff the entire piece of furniture with sandpaper (a 120Grade paper is best). Wipe over with a clean damp cloth to ensure the surface is clean from sanding dust.
If you are stripping paint off, it is best to do this by hand. Start with a belt or orbital sander using rough-grade sandpaper. Work your way through the grades until you are on a fine grade (if you have a laminate surface, you will not be able to strip it back).
Before painting, use masking tape to ensure a clean line from paint on the inside of drawers or doors. Make sure you buy good quality brushes, as this makes all the difference in hiding your brushstrokes.
If you are painting on solid timber you can start applying your first coat of paint (veneer furniture will need a prep coast first). For a professional finish, be sure to keep your brushstrokes even and in the same direction.
Apply at least three even and smooth coats of colour. Follow up, by applying a top coat of varnish or wax. This will seal the paint to ensure the furniture will wear well.
Related stories

Native ad body.

Native ad body.


Native ad body.