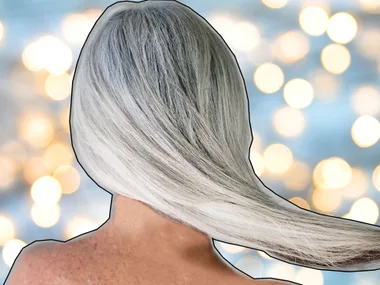
1. Picking the wrong shade
Going to the supermarket and shopping for hair colour can sometimes serve up a sushi train of options; however, to take the challenge out of choosing your favourite shade it’s best to go one to two shades lighter or darker than your own hair colour to achieve a soft and natural finish. It’s also important to match shades to your skin tone. Unsure where to start? Virtual reality has allowed for colour-match perfection in seconds. Try the My Shade App on Apple and Android — it’s genius!

2. Stained forehead, ears and neck
Despite how it sounds, this isn’t some strange rendition of Head, Shoulders, Knees and Toes; it’s a real-life, frankly pain-in-the-ass scenario that anyone who’s ever coloured their hair can relate to. The trick to avoiding said stains? Apply an oil-based product, such as Vaseline, Lanolips 101 Ointment or Lucas’ Papaw, to any areas that hair dye comes into close contact with, but that doesn’t actually need to be coloured ie. your hairline, the back of your neck and the top of your ears. If you forget to do that before you started applying, use a damp face cloth to tidy up any excess colour as soon as you’re done applying. The longer you leave it on there, the harder it is to get off. But, if you do find yourself with stubborn stains later, spritz a little perfume onto a face cloth and rub them off — the alcohol in your signature scent will break down the hair colour molecules easily.

3. Not being able to reach the back of your hair
There’s nothing worse than going to the effort of colouring your hair, only to realise you can’t quite reach the back of your head. Luckily there are a few tricks you can employ to avoid a patchy result. The first (and by far the most fun) is to phone a friend. Offer to provide dinner and wine in exchange for help with your hair. Better still, tag team and colour each other’s. Failing that, it’s all about sectioning. Divide your hair into four sections and secure with large plastic clips; take your middle part right down to the nape of your neck, and then section across from ear to ear. Start with the bottom sections first — your hair is naturally darker there so it’s fine for the colour to be on longer — pulling your hair forwards to make it easier to apply. If you’re still struggling, buy an extra mirror that you can cleverly position to get a view of the back.


4. The doorbell ringing halfway through
For some reason, it always feels semi-shameful to be caught colouring your hair at home. How dare you wear sweatpants and dance around like a madwoman while waiting for your greys to disappear! Short of not answering the door or phone — which we actually recommend, especially if you’re going darker or brighter and don’t want your mobile to match — the only thing you can really do is to opt for an at-home colour that works within its promised development time every single time. Try Clairol Nice’n Easy which delivers glossy and natural colour within 25 minutes and never a minute more. That’s quicker than the salon and you get to sing along to Adele. For stubborn greys, an extra 10 minutes of developing time is recommended for 100 percent coverage.

5. The result being different than expected
Sometimes, for no reason at all, bad hair colour happens to good people. More often than not however, it could’ve been avoided. How? Simply by doing a strand test. Sure, it seems like an additional, totally unnecessary step, right? Wrong. Aside from flagging whether you have any allergic reactions to the at-home hair colour — very important for first-time users — it also gives an indication of how your hair is going to look before you go the whole hog and colour your entire head of hair. It’s especially smart to do a strand test if you’ve previously dyed your hair as that can affect how the colour on the box will actually look on you. Remember, it’s always better to be safe than sorry.

6. Your brows not matching your new hue
Many people neglect to think about the colour of their eyebrows when altering their hair colour, but it’s actually one of the fastest tell-tale signs that your hair colour isn’t quite as natural as you want everyone to believe. As a rule of thumb, your brows are naturally darker than your hair colour by 1-2 shades so if you’ve recently gone lighter, it’s a good idea to subtlety bleach your brows, too. Keep in mind that most at-home hair colours are designed for your hair only, so don’t be tempted to use them on your brows. Visit a professional brow technician or go for a specialist brow tint instead, such as 1000 HOUR Eyelash & Brow Dye Kit. Problem solved.

7. Your bathroom looking like a murder scene
It’s a truth universally acknowledged that, no matter how careful you think you were/are during hair colour application, your bathroom will inevitably look like it belongs on How to Get Away with Murder. You just have to accept that now. And stock up bleach. It’s the only thing that can remove stubborn box colour stains from around the sink and in tiling grout. Leave it on for 10-15 minutes whilst you dry your hair, then scrub-a-dub-dub.

8. Leaving the colour on for way too long (or not long enough)
Got distracted by a good book or the latest creations on MasterChef? We don’t blame you. Head straight for the shower as soon as you realise, thoroughly rinsing the colour off. If you were going darker, chances are your roots will likely be quite a bit darker than your ends as the newer hair at your roots absorbs colour faster. If there’s a drastic difference and it bothers you, you’re best to book an appointment with your hairdresser so they can even out your colour. Experts warn against attempting to lighten your roots at home as it can often lead to further mistakes. If you lightened up and left the colour on too long, your hair may have an orangey tinge at the roots. After a day or two, you can touch-up your roots with a colour that’s one shade darker to correct the imbalance. And next time, save yourself the hassle and set a timer on your phone! Final tip: Always follow the enclosed instructions for the correct development time.
Brought to you by Clairol Nice ‘n Easy