If you’re anything like us, the winter chill is making you want to hunker down and hibernate ’til spring.
What could be better company than that bestselling book you’ve been meaning to read? The only problem is finding a cosy little spot where you can curl up and enjoy some peace and quiet for an hour or two.
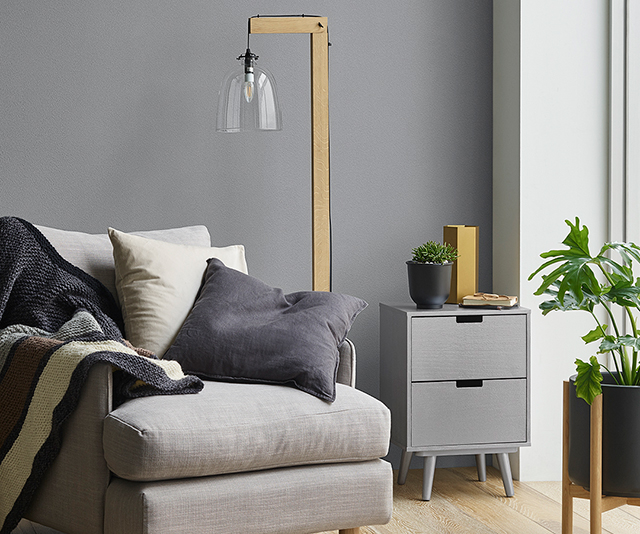
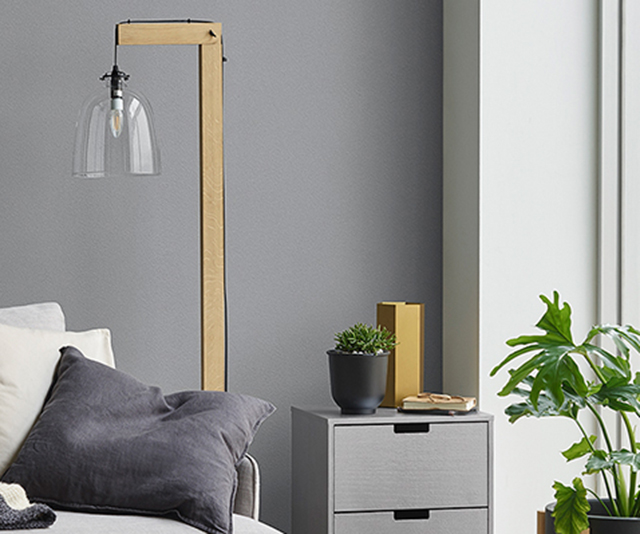
We’ve got the solution: An oh-so-simple DIY project that will transform an unused living room or bedroom corner into a warm and welcoming reading nook in just a weekend.
Track down an old chest of drawers you no longer use that could be perfect for storing books, and find a wasted space with nook-potential. Your favourite chair, a cosy blanket to snuggle up under and a few colourful cushions will provide the perfect finishing touch.
From that all-important shopping list to a comprehensive step-by-step guide, we’ve got everything you need to get started.
Your shopping list
Dulux Design Effects in your chosen colours. Dulux Design Suede Effect Grey Encounter (walls) and Dulux Design Metallic Effect Pluto Pulse (drawers) are the shades used here.
Undercoat/stain blocker (if required)
High quality synthetic brush for cutting in
Medium nap (10-18mm) synthetic roller for walls
Short nap (10mm) synthetic roller for furniture piece
Paint pot – for cutting in
Roller tray
Roller extension pole
Drop sheets
Painter’s masking tape
Cloth
TIP: Before you get started consider whether you’ll need an undercoat.
On painted surfaces in good condition with no stains or mould you should be able to skip this step. Just check the product label to find out if a light sand is required, and clean off any dust, oils and grease.
If you’re painting bare walls or furniture, apply one coat of undercoat (we like Dulux 1 Step Prep) first. Use a prepcoat, like Dulux Precision Sealer Binder, on bare plaster. Head to the Dulux website for advice on how to treat cracks, holes, mould and stains.
For the walls:
Remove all furniture from the room. Lay down a proper drop sheet to protect your floors. Try not to use old sheets as paint will often soak through. Mask skirting boards, window trim and electrical switches with painter’s tape.
Start by cutting in around the edges of the wall with a brush – these are areas the roller cannot easily reach.
Load the roller in the tray with a reasonable amount of paint.
Start rolling the wall in an ‘M’ pattern. Start closest to the natural light source. Continue over the same section until the wall is evenly covered.
Using an unloaded roller begin in the top left corner of your wall and gently let the roller roll down to the baseboards in a straight line with no pressure. A lightness of touch will prevent new roller marks from forming. Repeat this action, only this time, slightly overlap your last movement so your roller rubs away the line created by the previous stroke. Continue this across the area you have painted. This is called laying off.
Reload your roller and repeat until the wall is complete.
Working in small sections, apply the second coat with the roller and use a wide brush, dry roller or muslin and drag the paint in a random overlapping pattern.
For the drawers:
Start by cutting in around the edges of the furniture piece with a brush – these are areas the roller cannot easily reach.
Apply the first base coat with the roller.
Allow drying time as specified on the label.
For an even one dimensional finish apply a second coat with the roller and lay off lightly to prevent the formation of roller marks.
For a flat finish your project is complete.
For a more textured finish, work while the paint is still wet. Use a wide brush, dry roller or muslin and drag the paint in a random, overlapping pattern. For a brushed finish, lay off lightly with a brush. A clear coat may be applied to protect the surface.
TIP: Tie ornaments in to the colour scheme by spray painting them in black or metallic shades. We used Dulux Duramax Metallic Finish Gold and Dulux Duramax Black Satin.
Brought to you by Dulux. Find more fun weekend projects at the Dulux project hub.
.jpg)