Prep 1½ hours
Cook 1¼ hours
Serves 30
Basic butter cake recipe
This masterpiece requires two round butter cakes, one 18cm in diameter and the other 22cm. We used a 470g packet of butter cake mix to make one quantity of cake batter. If you’d prefer not to use packet mix, follow the recipe below to make one quantity of cake batter. You will need one and a half quantities of batter for the 18cm round cake and two quantities of batter for the 22cm round cake.
125g butter, softened
½ tsp vanilla extract
¾ cup (165g) caster sugar
2 eggs
1½ cups (225g) self-raising flour, sifted
½ cup (125ml) milk
1. Preheat oven to 180˚C or 160˚C fan-forced. Grease and line an 18cm and a 22cm round pan with baking paper.
2. Using an electric mixer, beat butter, vanilla extract and sugar until light and fluffy. Beat in eggs, one at a time. Stir in flour and milk. Transfer batter to prepared pans and bake 18cm round cake for about 45 minutes and 22cm cake for about an hour or until a knife inserted in centre of cakes comes out clean.
To decorate
3 x 375g packets white chocolate melts
sky blue gel food colouring or chocolate
food colouring powder
blue sanding sugar
1½ quantities buttercream (see recipe below)
dark blue food colouring
Frozen character figurines
1. Place white chocolate melts in a large heatproof bowl over a saucepan of simmering water (don’t let simmering water touch base of bowl) and gently stir with a metal spoon until smooth and melted. Tint chocolate sky blue.
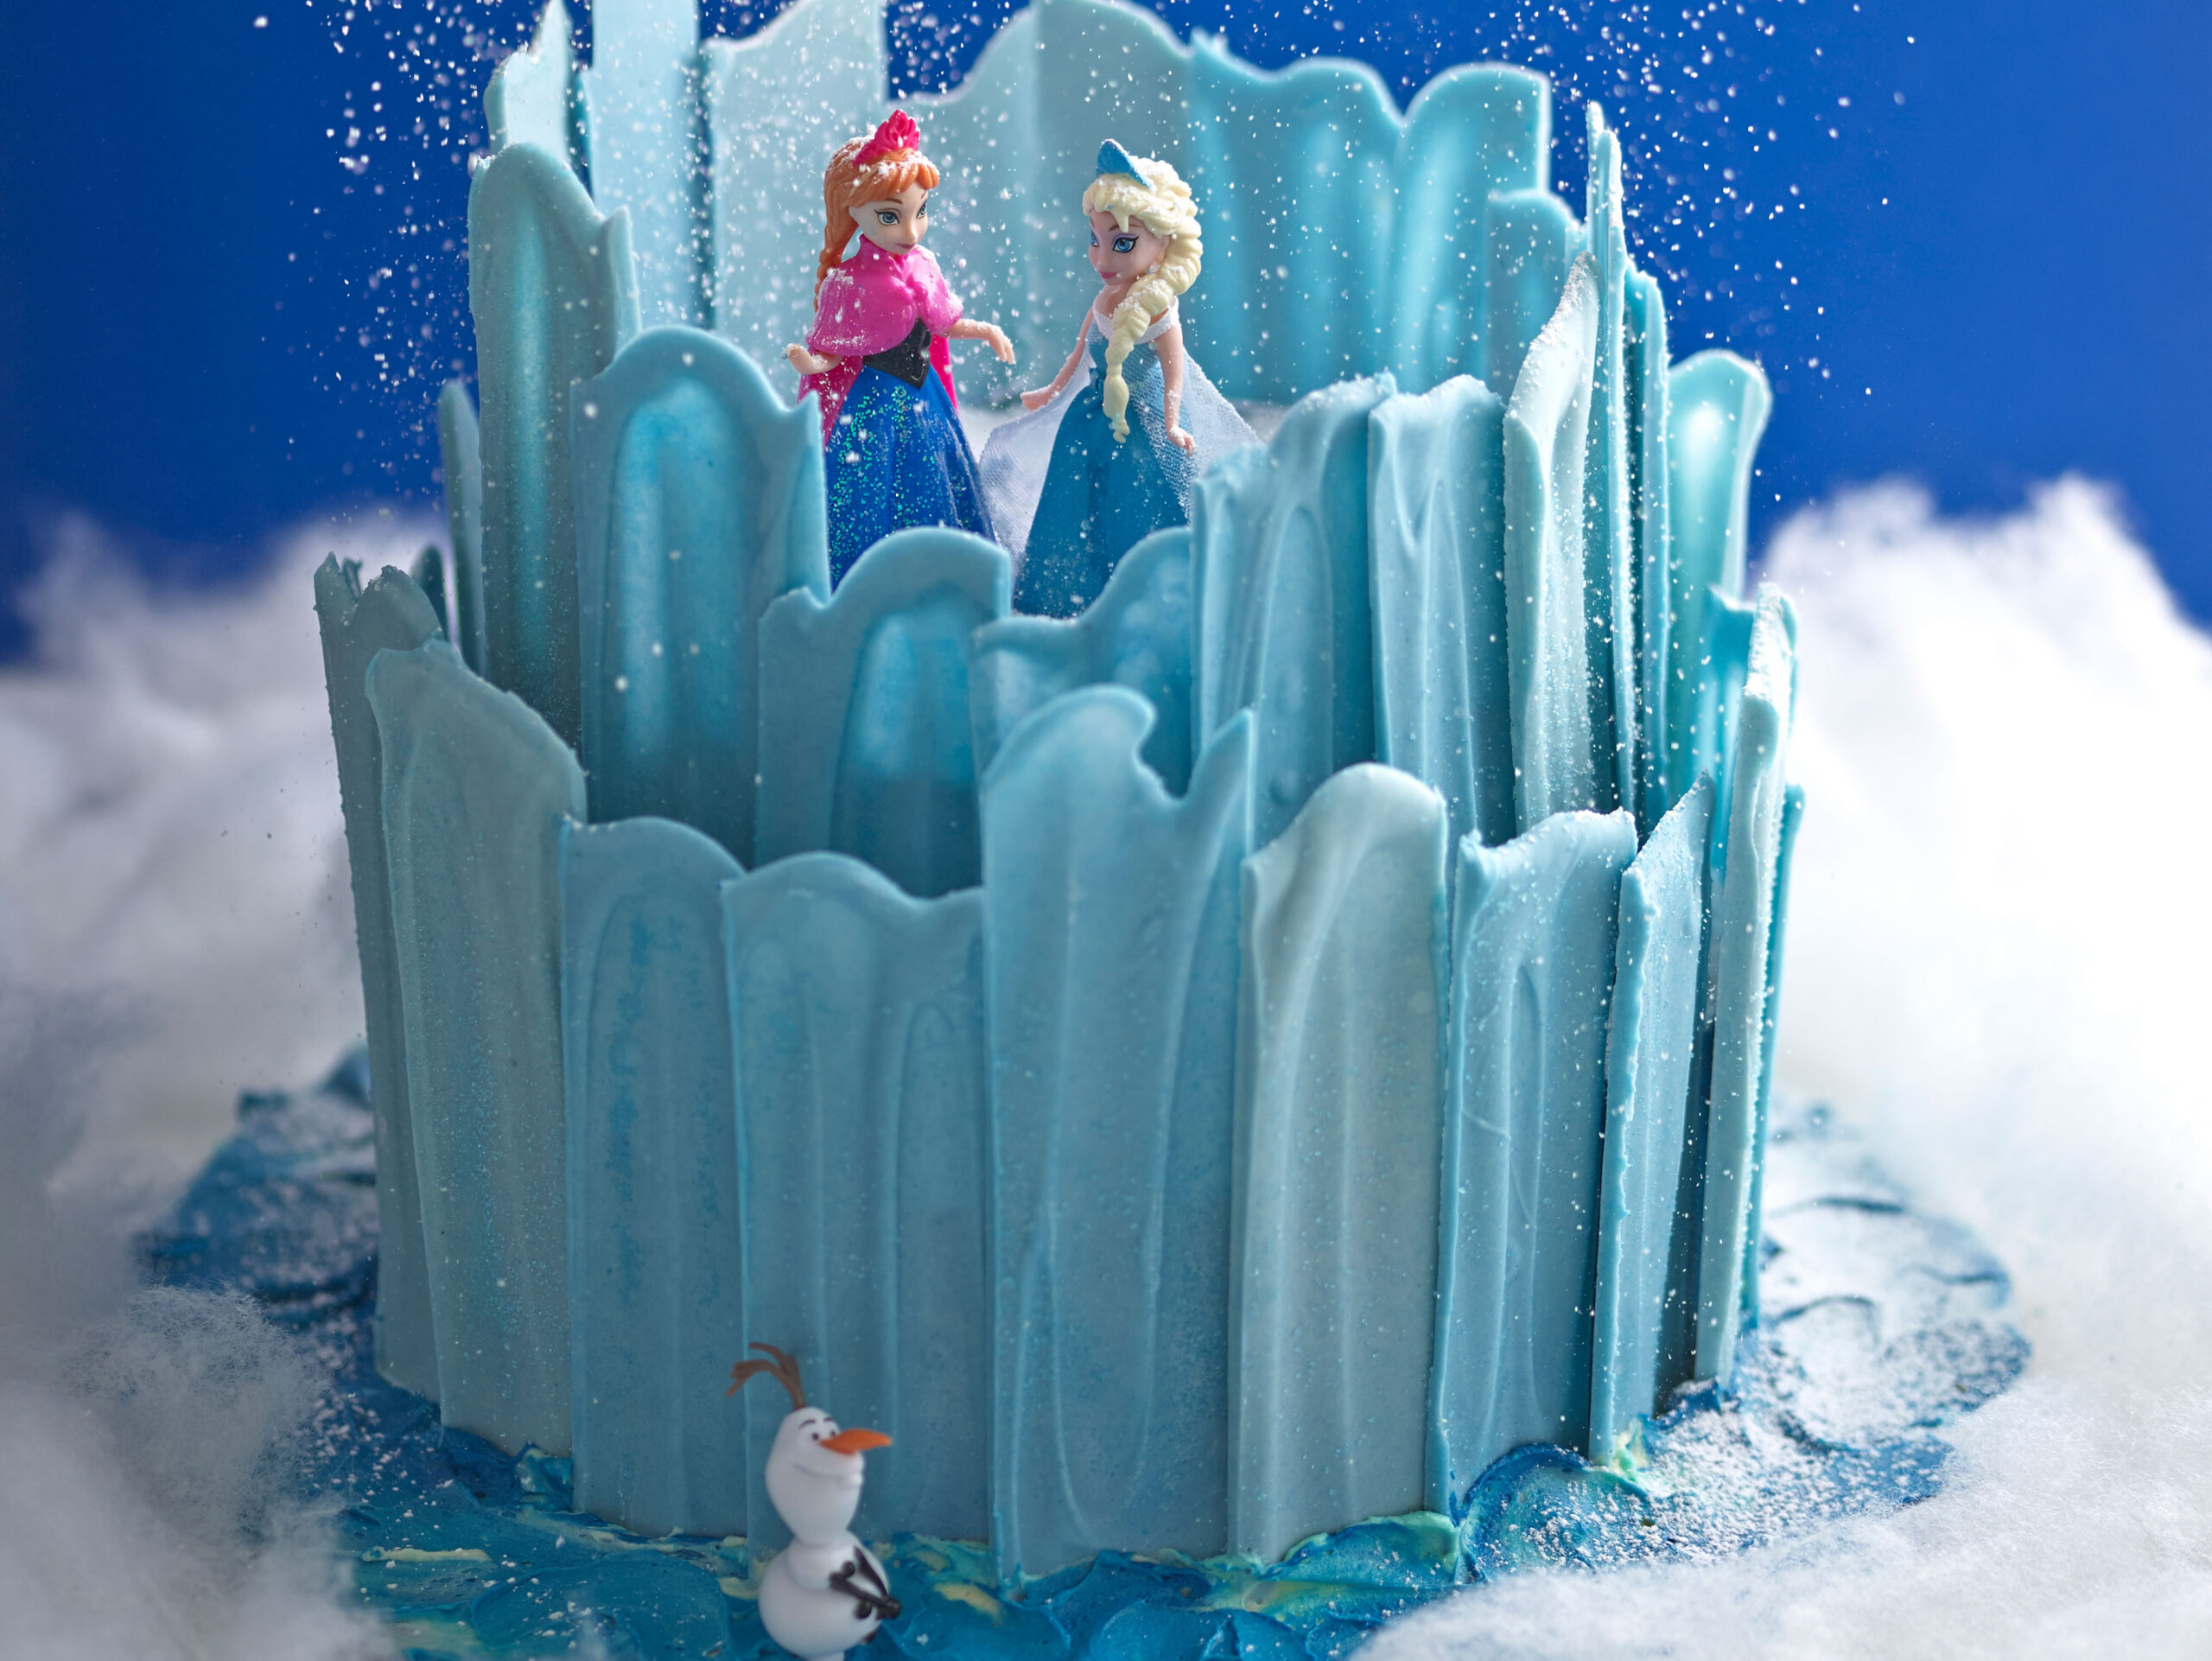
2. Cut six sheets of baking paper about 60cm long and 30cm wide and place on a clean work surface. Pour a little melted chocolate along length of one baking sheet and, using an offset spatula, spread chocolate to about 50cm long and 15cm wide. Using an up and down motion, continue spreading with offset spatula to create ridges and uneven heights until chocolate is 2mm thick. Lightly sprinkle over blue sanding sugar, then leave to set for 10 minutes. Repeat with remaining baking paper sheets, melted chocolate and blue sanding sugar.
3. Run a large knife under hot water to heat blade. Wipe blade dry, then trim long edge of chocolate sheets to straighten. Heat blade and cut chocolate sheets widthways into 5cm wide strips to make approximately 60 ice blades.
Set aside in a cool place until needed.
4. Place larger cake on cake board. Spread a little buttercream over top of cake in centre, then place smaller cake on top. Tint remaining buttercream dark blue, then spread over top and sides of both cakes. Reserve remaining buttercream.
5. Place ice blades around sides of top cake, pressing into buttercream to secure. Overlap a little so that no buttercream can be seen from the outside. If necessary, secure blades with a little reserved buttercream. Repeat with bottom cake, so both cakes are completely layered with ice blades. Spread reserved buttercream around base of cake and decorate with Frozen character figurines.
Buttercream recipe
The recipe below makes one quantity of buttercream.
125g unsalted butter, softened
1½ cups (240g) icing sugar mixture
2 tbsp milk
1. Using an electric mixer, beat unsalted butter until as white as possible.
2. Gradually sift in half the icing sugar mixture, then add milk and remaining icing sugar, beating to combine.
This recipe is an edited extract from the 2014 Disney Kids’ Party Cakes cookbook (Bauer Media, $12.95).